how to

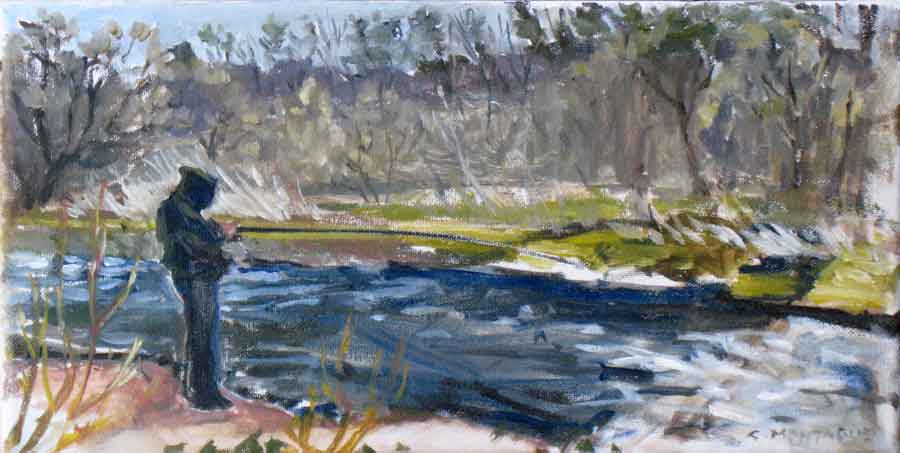
Cast Fishing, Cast Shadows. Plein Air Painting by the Credit River in Mississauga, Ontario, Canada

Plein air oil painting Copyright Christine Montague 2009 2010 Update: This original plein air oil painting, painted on location by the Credit River, -under the bridge at Burnamthorpe Bridge between Riverwood Park and Erindale park -  has been given as a charitable donation to the Art Gallery of Mississauga (AGM) for its 2010 7th Annual Art Auction Fundraiser, April 29th, 2010.

Above is a 6" x 12" oil painting of a man fishing by the Credit River. We are both under the enormous Burnamthorpe Road bridge -  between Erindale Park and Riverwood Park. The day was sunny but the shadow and the wind was cold! After 3 hours my convulsive shaking told me the painting was now finished.

Today I had the fun of plein air painting  with the newly formed group,  Ontario Plein Air Society (OPAS). I had not painted on location in years and never before with oils  ( the exception  Tapatoo Tree (sold) in water soluble oils ) .  Painting on location is quite exilarating - at least that is what I felt after I was done, and could seek relief from the cold and wind in a more sunny spot.

Just before I headed out to meet up with OPAS at Riverwood Park, I quickly thumbed through some International Artist & other art magazines for some helpful hints. Painting on location requires effort put into the logistics.

Following the example of British artist James Hart Dyke (American Artist magazine November 2003) I used the limited palette French Ultramarine, cadmium yellow, cadmium red light, raw umber and titanium white.  What freedom!

Once on location, I struggled a bit with what to paint. I sat across from an enormous old tree, partiatially in decay - but what I wanted to say about this tree could not be said on my 6" x 12" canvas. Suddenly I found my self doing a quick - almost Japanese brush like gesture of the fisherman before me ( I could have drawn him all afternoon) and that was that - I had my subject. I guess I just cannot escape the call to put a figure in my landscapes.

Mini Art lesson 4. Learn Along with me in How to Paint Grays in Oil.

One of the reasons I wanted to create the painting I have in progress at the moment (scroll down) was the challenge to paint many variations of the colour gray. A trivia  email going around states that the human eye sees 500 shades of gray. In trying to confirm this online,  I have found the human eye sees 500, 700, 256, a dozen and less than 16 shades of gray.  Whatever the true answer is, it is a lot more than I normally mix in  my standard palette, and in the creation of this painting  I hope to illustrate as many variations as I can. Normally, I use the following  standard palette -

My usual pallette

  • cadmium yellow pale
  • yellow ochre
  • cadmium red
  • alizarin crimson
  • viridian
  • olive green
  • chrome green
  • cerleum blue
  • cobalt blue
  • ultramarine
  • burnt umber
  • titanium white

I create black from mixing equal parts burnt umber and ultramarine and my grays from adding white to that mixture. (see lower right of palette above)

gey-beginning4

So how to expand on my knowledge of creating grays?

I turned to the terrific book I bought recently Color Mixing For Artists Minimum colors for maximum effect using watercolors, acrylics, and oils by John Lidzey, Jill Mirza, Nick Harris, and Jeremy Galton. Barrons Educational Series Inc. This is one of the most readable, portable, helpful and affordable color books found in our local stores.

This is the starter palette from Color Mixing For Artists

Starter palette for oils

  • titanium white
  • lemon yellow
  • cadmium yellow
  • yellow ochre
  • cadmium red
  • alizarin crimson
  • Winsor violet
  • French Ultramarine
  • raw umber
  • Payne's gray

The book has a whole section on mixing gray as well as sections on mixing most other colors

Mixing Gray oil paint

Palette 1. Using Alizarin crimson, viridian, ultramarine, lemon yellow

Left: 7 parts viridian, 1 part alizarin, 2 white

Centre: 3 part viridian, 1 alizarin crimson, 6 white

Right: added some more viridian and white  to left mixture

Ignore blue blob

Mixing grays

Palette 2

Left: 2 parts French Ultramarine, 1 alizarin crimson, 2 lemon yellow, trace white

Centre: 4 parts French ultramarine, 1 cadmium red . White.

Right: 20 parts viridian, 1 part crimson, white, and more white

palette 3 Mixing gray in oil paint

Palette 3

Top left: 4 parts cerelean blue, 2 camium red, 1 lemon yellow, 2 white. And more white.

Bottom left: Mixtures of ultramarine and alizarin and white.

Bottom right: cerelean blue, burnt umber , white

Top right: 3 french ultramrine, 1 alizarin crimson, trace lemon yellow, white

Of course what I am really doing for much of this painting is creating the illusion of white painted surfaces- the railing, painted walls, white flowers on the t-shirt- in shadow and reflection. One of the great joys of painting is learning to intrept just what it exactly what we are seeing. When asked what colour are the walls, we would answer white, but what we paint is another story.

An additional note. A couple of years ago I enjoyed a show entitled "White" at the the Abbozzo gallery in Oakville.  Examples of the interpretation of white from all the gallery's stable of artists wwere on display. This show was a great example to all painters and students on the myriad of ways to paint white (and its grays)  - whether in abstract. realistic or illustrative painting. To see a few examples from this show click here.

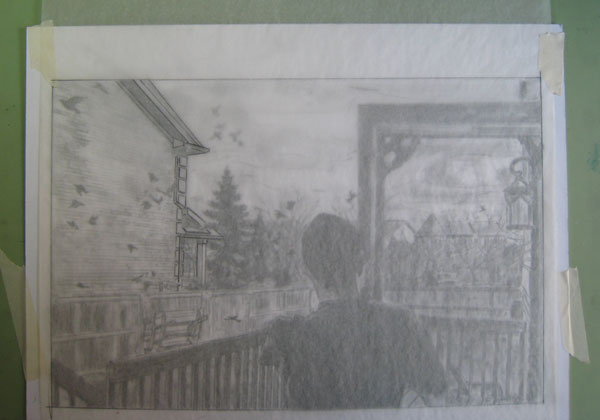
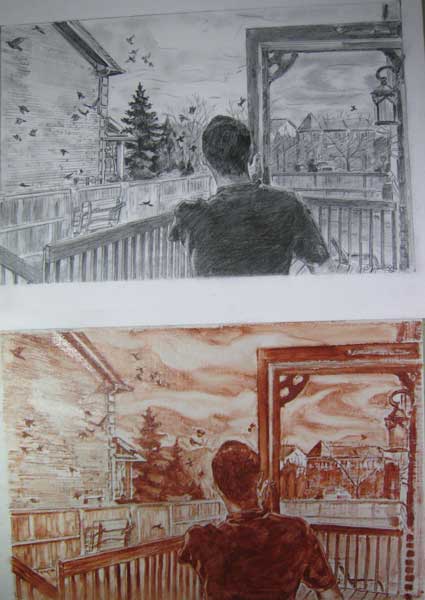
Mini Art lesson: Drawing to Underpainting. Christine Montague Oil painting "Wishing.." Begins

Do you ever wonder how one begins a painting?  Here are the first steps of my  painting  in progress now. Anxious to start painting "Wishing it was His Turn to Go" ,    and not interested to make my own canvas (the image is a not to standard canvas size), I ordered a Fredrix, artist museum quality primed linen board that I could cut to size.  Bought online, the statement "hand-primed pure Belgium Linen sounded good to me.  But when they arrived approximately a day later, I was surprised to see the warning, in caps,  that includes .., EXPOSURE MAY CAUSE HARM...NERVOUS SYSTEM, KIDNEY OR BONE MARROW DAMAGE. Wash ahnds immediately after use. When using so not eat, drink, or smoke. (shouldn't do that when oil painting anyways). Wear an apron (what kind?! a lead one?)  .

Oh, my.

Still, onward.

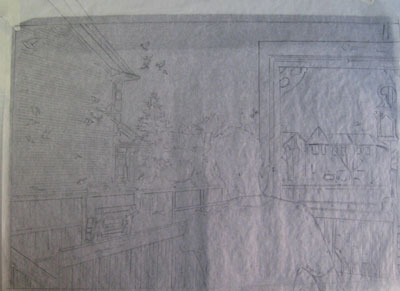
The first step in transferring my drawn image is to tape a sheet of tracing paper over the image. I carefully draw the  outline edges first. This serves as my registration reference.

Transferring the drawing to the painting surface Copyright Christine Montague

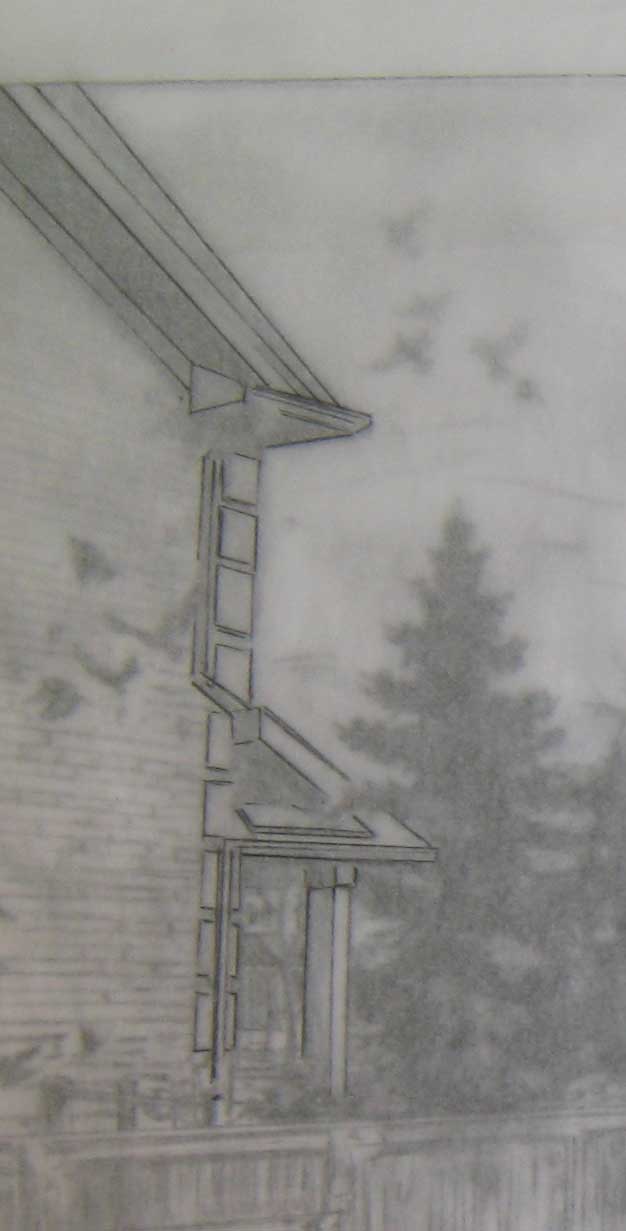
Next I do an outline drawing fof the image. I do not bother with any shading. In this case I draw quite carefully. I like the original drawing and do not want to leave impressions on it by pressing too hard.  I include all major detail as there is a fair amount of detail in the original image that I do not want to loose.

Detail of tracing Copy right Christine Montague 2009

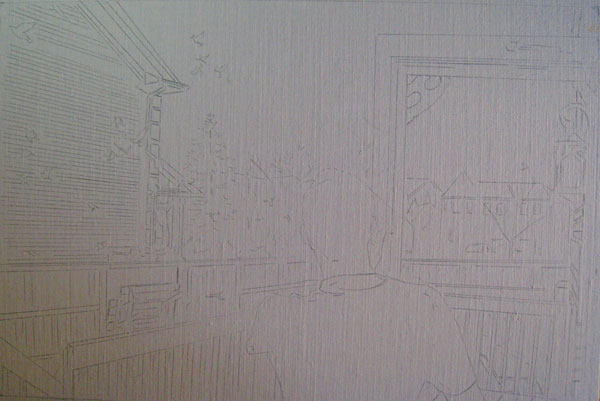
I  tape the traced drawing onto the linen board & slid a sheet of graphite paper between the two layers.  I had not yet cut the board to size and so had extra space on which to tape. I was grateful after I did this. I usually work on gallery mount canvas (canvas with a deeper profile) that I do not frame. That I had not yet cut the board let me add a 1/4" around the image to accommodate for any frame overlap.

Graphite used to transfer drawing to linen board. Copyright Christine Montague 2009

Here is the transferred drawing.  Somehow , in the using the new board, I have been thrown in my process. For an under painting I usually stain the surface first. If I do it at this step, it will dissolve the graphite drawing. Staining gives me a mid tone to work from. I remove the paint for my lights, and add to it for the darks.  Now, as much as the drawing and redrawing in the above processes helps me really know my painting, so I paint with  confidence,  I don't really want to be that confident, and start the whole process again!

Drawing the outline Step 2 to tranfer drawing to painting surface Copyright Christine Montague

Here is the tonal values of the painting.. Not as well defined as normal due to the lack of staining , but enough so I understand what is going on with the piece when I begin to paint with colour. I did the under painting in Old Holland Classic Oil Colours Burnt Sienna. Note: I found the oil gesso on the linen board very different to gesso on pre purchase canvas. It was shiny and almost acted as a resist.  Also, because I had not precut the board or sealed it with a stain, my hands had been in constant contact with the board. Remember the lead warning at the beginning?

Original drawing & Underpainting Copyright Christine Montague 2009