Protecting That Painting
Here’s a tried and true packaging method for shipping an unframed canvas. Using the steps below, I have successfully shipped my polar bear art from my GTA (Greater Toronto Area) studio in Ontario, Canada to as far away as Australia.

Why does it matter how safely you pack your art? Imagine the misadventure your painting will potentially experience on its journey. You want that box that has been rained on, spilt on, torn, and dropped to still deliver an unscathed painting to its new owner.
Did you ever do that high school experiment of packaging a raw egg to protect its shell and dropping it off a roof? Well, think of your painting as that egg. Your goal is to keep that painting nestled, unmoving in the centre of its little box universe. The following steps may seem excessive, but your art , as well as your clients deserve the effort!
You will need-
packaging tape (the better the quality, the less the frustration at finding that disappearing end)
Scotch tape
metal ruler
box cutter
scissors
acid free bag or glassine paper for canvas
Acid free bag or glassine paper for corners
plastic bag
bubble wrap
box if canvas less than 48”. Buy a box that is 2 to 3 inches larger than each canvas side, so the painting “floats”, unmoving, in the centre of the box. For eg. for a 12”h x 12”w x 1.5” deep canvas , use a box that is 16” x16” x 4 -5” deep or a 18” x 18” x 4 -5” deep.
crate your art if canvas larger than 48”
scrap cardboard for corners
3 pc cardboard or foam-core (aprox. 1/2” thick) for backing the painting and sandwiching it.
permanent black marker
small reclosable bag for paperwork outside the box.
thank you card, business cards, Certificate of Authenticity, invoice &/or other paperwork
fragile stickers (or use marker)
Optional: Double sided tape
clean place to work
a cutting board is handy but not necessary
white gloves or clean hands for handling your work
camera
Step 1 - Getting Started to Package That Art
The first thing to do is put aside some time for this task. Packing art takes longer than you would think, and why stress yourself out?!
Take a photo of your art, and every step or two, photograph what you are doing to document that a) what the artwork looks like and b) you packed this properly . I’ll remind you at the end, to also photograph the outside of the box and that if you use a courier, snap the art going to the vehicle, to show that it was actually picked it up.
Then clean up your workspace. There’s nothing like taping up that last bit of layers of plastic and spotting that little something that shouldn’t be there through the bag. ( you might love Fluffy, but….)
Get all your supplies together. Even if the artwork is a lot smaller than the 48” x 36” oil painting I’m using as an example, it’s still an involved process. It will go a lot smoother if everything is at your fingertips.
I use a fold up table table to package on.

A large, clean work space makes life easier when packing. Don’t look too closely at the floor, as this appears to be a do as I say, not as I do situation.
Step 2 - Place Canvas in Acid Free Bag
Wearing your white gloves or having just washed your hands, insert your painting in an acid free bag or wrap it in glassine paper. The goal is to keep oils or any other acidic material off your art and the inside of that bag, too. The bags I use have a resusable seal.
Note: Glassine paper is not readily available to me, so I use acid free bags. The bags come in a variety of sizes.
Tip: I overlap and tape two bags together when I need a really large or odd-size bag. I don’t want tape touching the painting.
Step 3 - Create a Backing
Place the painting on a 1/2” thick backing of cardboard or foam-core cut to the same size or slightly larger than the art. I usually add a half inch per side.
At the time of these photos, I lived near a moving supply store that sold single sheets of 4’ x 8’ cardboard. Hopefully, you do, too, because it makes everything so much easier.
Tip: I either can’t find 1/2 “ thick foam-core or cardboard, or when I do, it’s too expensive. So I create my own 1/2” thick material, by using two layers of cardboard or foam-core adhered together with double-sided tape.

Painting in acid free bag, on a backing board that is lightly larger (although it can be the same size) than the artwork.
Step 4 - Attach Painting to Backing With Acid Free Corners
Now I’m going to make corners from small acid free bags or glassine paper to hold the canvas on to the cardboard or foam-core backing. This gives the canvas back protection. The painting is held in place without the pressure of tape.
To make the corners:
Cut an 8” x 8” square, either of glassine paper or acid free bag. If you have a 4” x 8” bag (or one approximately that size), use scissors to open up two of its edges and cut off the sealable flap. You can now open up the bag and have a square.
Fold your square in half to create a triangle. Then fold it in half again.
Tape the shorter open edge of this corner. Leave the longer side open. I tend to use a piece of scotch tape first because of the fiddliness of it all, and then I apply a piece of the stronger packaging tape.
Voila! Now you have a strong little pocket -like corner. You need 4 of these.
Or..
In the photo below, I made corners by simply cutting off the corners of appropriately sized bags I had in stock. But I think the homemade ones are stronger.
Now..
With your painting centred on backing, slip on corners and attach corners to backing with packaging tape.
The Goal? The tape should not touch your bagged painting. The corners will do all the work in holding the painting in place against its protective backing.

The green cutting board is very handy for quick measurements. Metal rulers are best for cutting against.

Step 5 - Bubblewrap your Art
Now that your canvas is attached to its backing, wrap it in two layers of bubble wrap.
Goal? Cushioning that baby!

At this point the painting is in an acid free bag, is attached to a backing board with corners and is in two layers of bubble wrap.
Step 6 - Waterproof It!
Place your bubblewrapped art in a plastic bag and seal it completely. I use clear recycling bags for smaller canvases but am able to purchase sturdy oversized bags from the same company I purchase my acid free bags from.
Remember every painting is subject to exposure from rain, puddles and spills from someone else’s poor packing job!
Step 7 - Cardboard Backing and Front
Before you put your bubble wrapped painting in the box, there is one last protective layer to make. You will need two pieces of card board or foam-core that are the same size- one for the front of your painting and one for the back. Once again I double up my thinner cardboard to create an approximately half inch depth.
Make your backing and front board about 3 - 4 inches larger than each side of your original canvas.
For example. The painting I am packaging is 48” x 36”. So I added 3 “ per side. The height is now 48” + 3” + 3” = 52”. The width is now 36” + 3” + 3” = 42”. So I made front and back boards that were 52” x 42”. You can see how handy the 48” x 96” cardboard pieces are for canvases this size!
Boards now ready, place the wrapped canvas on its backing board.
Tip: At the time I took these photos, I lived in a much larger city, and near a couple of fabulous moving supply stores. Whatever size box I needed I could find, so I could bundle up my painting first, and then find a box that fit it perfectly. Now, my box selection is very limited. I measure the inside of the box I buy, to make sure the final bundle I put together with its backing boards fits in.
So let’s say I am wrapping a 20” x 20” painting . Before I moved, I would wrap away, and the bubble wrapped , sandwiched in cardboard work, might have ended up as 26.5” x 26.5” in size (different bubble wraps, for example, mean a slightly different dimension. I would find a box that was 27” x 27” and it was good to go.
When I don’t have a selection of boxes, I find the roomiest one, measure the inside dimensions so I know the largest size my backing board can be. I package my art to stay with in the dimensions of the backing board. There’s nothing like doing all these layers and finding out the finished bundle is 1/4” too big for the box!

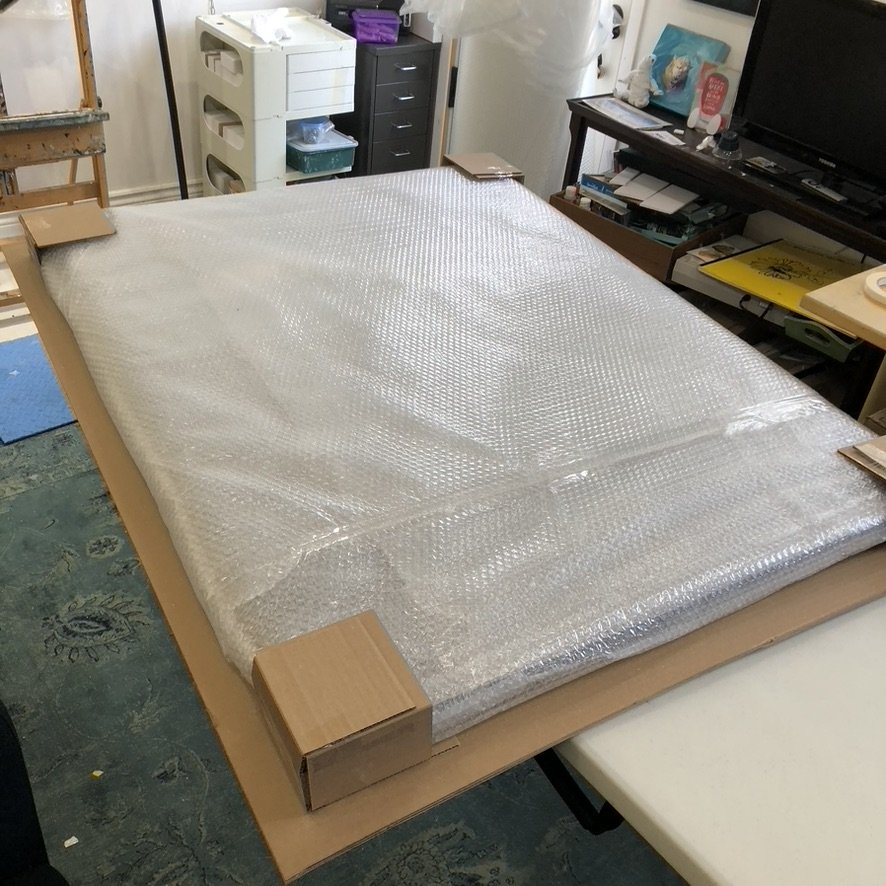
After 2 layers of bubblewrap, the painting is placed in a waterproof bag and sealed with packaging tape . The backing board is cut to be 3” larger than each side of the bundle.

Here is the bundled up painting on the backing board. Next step? Cardboard corners and a top cardboard.
Step 8 - Make Cardboard Corners
This is usually about the time I’m thinking Does this never end?! I don’t like cutting corners hahahaha.
To make the corners -
Cut 8 equal size strips of corrugated cardboard. If you can, cut them so the corrugation is going across the short side. This way they fold easier. If you can’t, then lightly score the cardboard with your boxcutter on the inside of where you are going to fold.
Because each painting’s depth of bubblewrap always turns out slightly different for me, I don’t pre-make all these corners. Maybe you’ll have better luck at this than me!
To size it, I hold each strip up to the corner of the painting and bend it into shape. Then I take another strip and bend it over it , tape the two together with packaging tape, and voila! Corner created! See the photos below, because I realize this is not a clear instruction.
Why are you doing this? You don’t want your bundled painting to move around or even fall out of the corners, so the fit of the each corner shouldn’t be loose. However, too a tight corner will dent your painting when you do the next step of sandwiching you painting between the backings.
Tip: This is about the time I put Netflix on.


Step 9 - Sandwich Your Art
With your bundled art place in the centre of your backing board, slide each of the cardboard corners on. The corners should not be digging into the painting. Then place the other backing board on the top.
Tape around the corners , using a bit of pressure (not too much, you don’t want to damage your painting) . By gently tightening the corners together, the painting will be held firmly in place. Once again, no actual tape is touching the artwork so that ripped packaging won’t affect the layers beneath.
Slide on cardboard corners.

Place top backing board on. In this photo you can see how my boards are made of double layers of cardboard.

Not the neatest job, but you can see how I’ve wrapped the tape around the corner applying a little pressure to trap the cornered art in between the two backing boards. The painting shouldn’t shift or move around. This way, once in the box, it should remain suspended in the centre.
Step 10. Place Art in Shipping Box or Crate.
Wait! Before you seal up that box, remember to place a clear bag or envelope with a thank you note, invoice, Certificate of Authenticity, business card, or anything nice you can think of inside the box. Preferably attach it to one of the backing boards. If, heaven forbid, the box is damaged, label removed, or the box simply lost, there is some identifying info INSIDE the box.
At last you can place the your artwork into the box or crate. Attach shipping label, return address and what ever shipping invoices you have firmly to the box.
If the packed art is moving around in the box, use light material - paper or bubblewrap scraps to fill the gaps.
Adhere Fragile stickers or write fragile on box.
Tips: Use a permanent marker to write on the outside. Don’t forget postal codes, zip codes and return addresses.
When I ship internationally, I usually arrange it through my affiliate online gallery. They provide all the pertinent and complicated paperwork re: duty, etc. I attach a large ziplock bag (the type for food) to the outside of box with packaging tape and place the papers in it, cutting or folding them slightly to make sure I can close the ziplock.
Remember to snap a clear picture of your parcelled art. If the painting gets lost - which did happen to me once (and it was found using the photo of the box) - you may be asked for photos of both the outside and the contents of the parcel.
And why take a photo of the courier taking away the parcel? Because once, after waiting in all day for a courier, the painting was finally picked up in the evening. For some reason, it didn’t record with the company that it had been picked up and I was contacted by the gallery inquiring why I hadn’t fulfilled my part of the bargain. By luck, I had photographed the courier with the art going to the van, just for fun, to do a post the painting is off! So, I was immediately able to reply with the photo and it got sorted. So document, document!
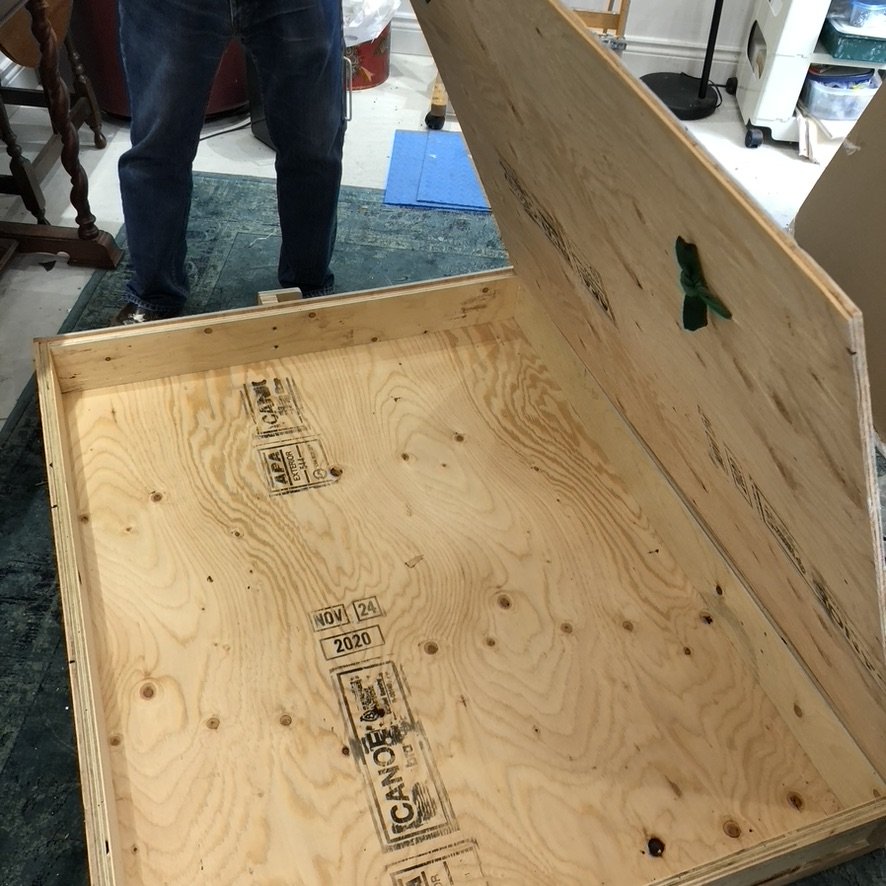
I used a crate for this painting because of its size.

The crate was made exactly to the dimensions I had figured out the bundled art would be.
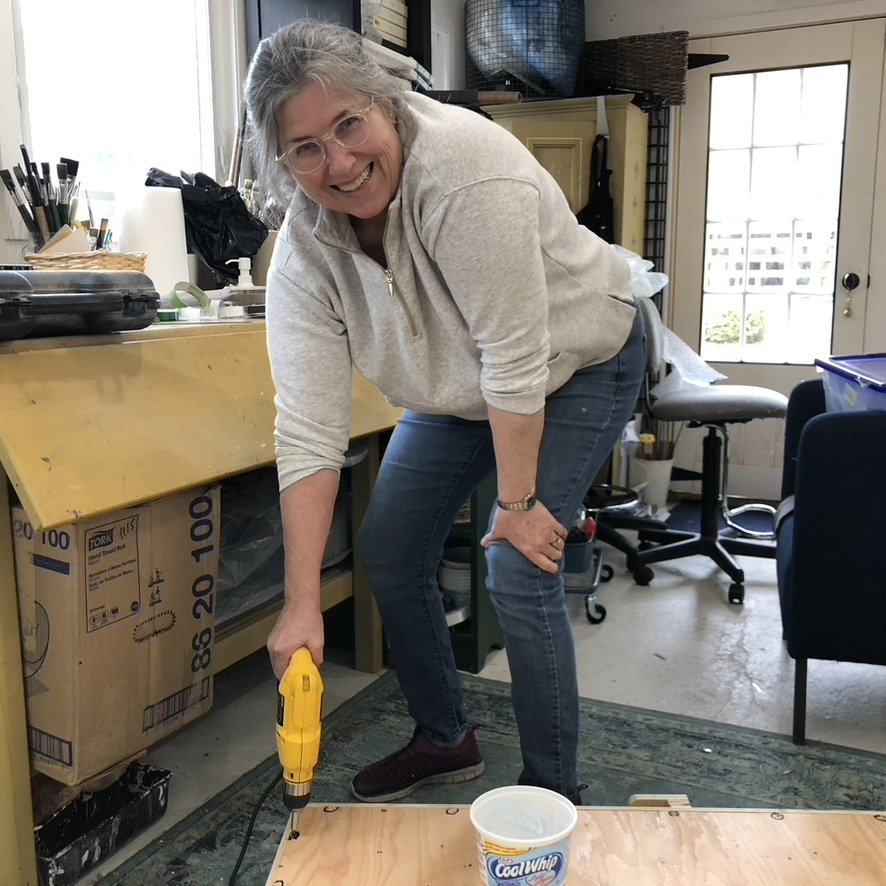
An electric screwdriver is a helpful tool when packing a crate.

Attach your shipping label and paperwork securely.
Here’s a Summary of How to Package Your Art for Shipping
Clean your work space & get your supplies together
Place art in acid free bag
Make a backing board the same size or slightly bigger than the canvas
Make acid free corners & attach painting to backing board with them
Wrap you painting in two layers of bubblewrap
Seal your painting into a waterproof bag
Make 2 protective backing boards
Make 4 cardboard corners
Sandwich your art between boards. Tape info (invoice , thank you note, etc.) in bag to the cardboard.
Place art in box. Seal securely with packaging tape. Label outside, attach paperwork if any, mark fragile.